The treatment of Martin B. Leisser's portrait of Benjamin Franklin

Martin B. Leisser (1845-1940) was a prominent Pittsburgh area landscape and portrait painter. Leisser was born on the South Side of Pittsburgh and began his career by painting flowers on furniture. He
later lived and trained in Munich for several years with his family.
Leisser went on to paint the likenesses of the Carnegie family, among other socialites of the Pittsburgh elite, and would be known as “the father" of the art school at Carnegie Tech. He was also the
headmaster of the former School of Design for Women.

Though better known for his Pittsburgh landscapes, his portraits employ the same attention to detail, subtle hues, and softness of hand.

One of his winter scenes was featured in this recent “Pittsburgh
Post-Gazette” article:
http://www.post-gazette.com/life/holidays/2014/12/25/Landscape-artist-captured-mood-of-Sixth-Avenue-Downtown-in-1902-Pittsburgh-snowstorm/stories/201412250027

Martin B. Leisser's portrait of Benjamin Franklin is currently owned by Washington and Jefferson College in Washington, Pennsylvania, and hangs in the U. Grant Miller Library. The painting is currently being treated due to damage sustained by a fall and subsequent impact with a desk. 

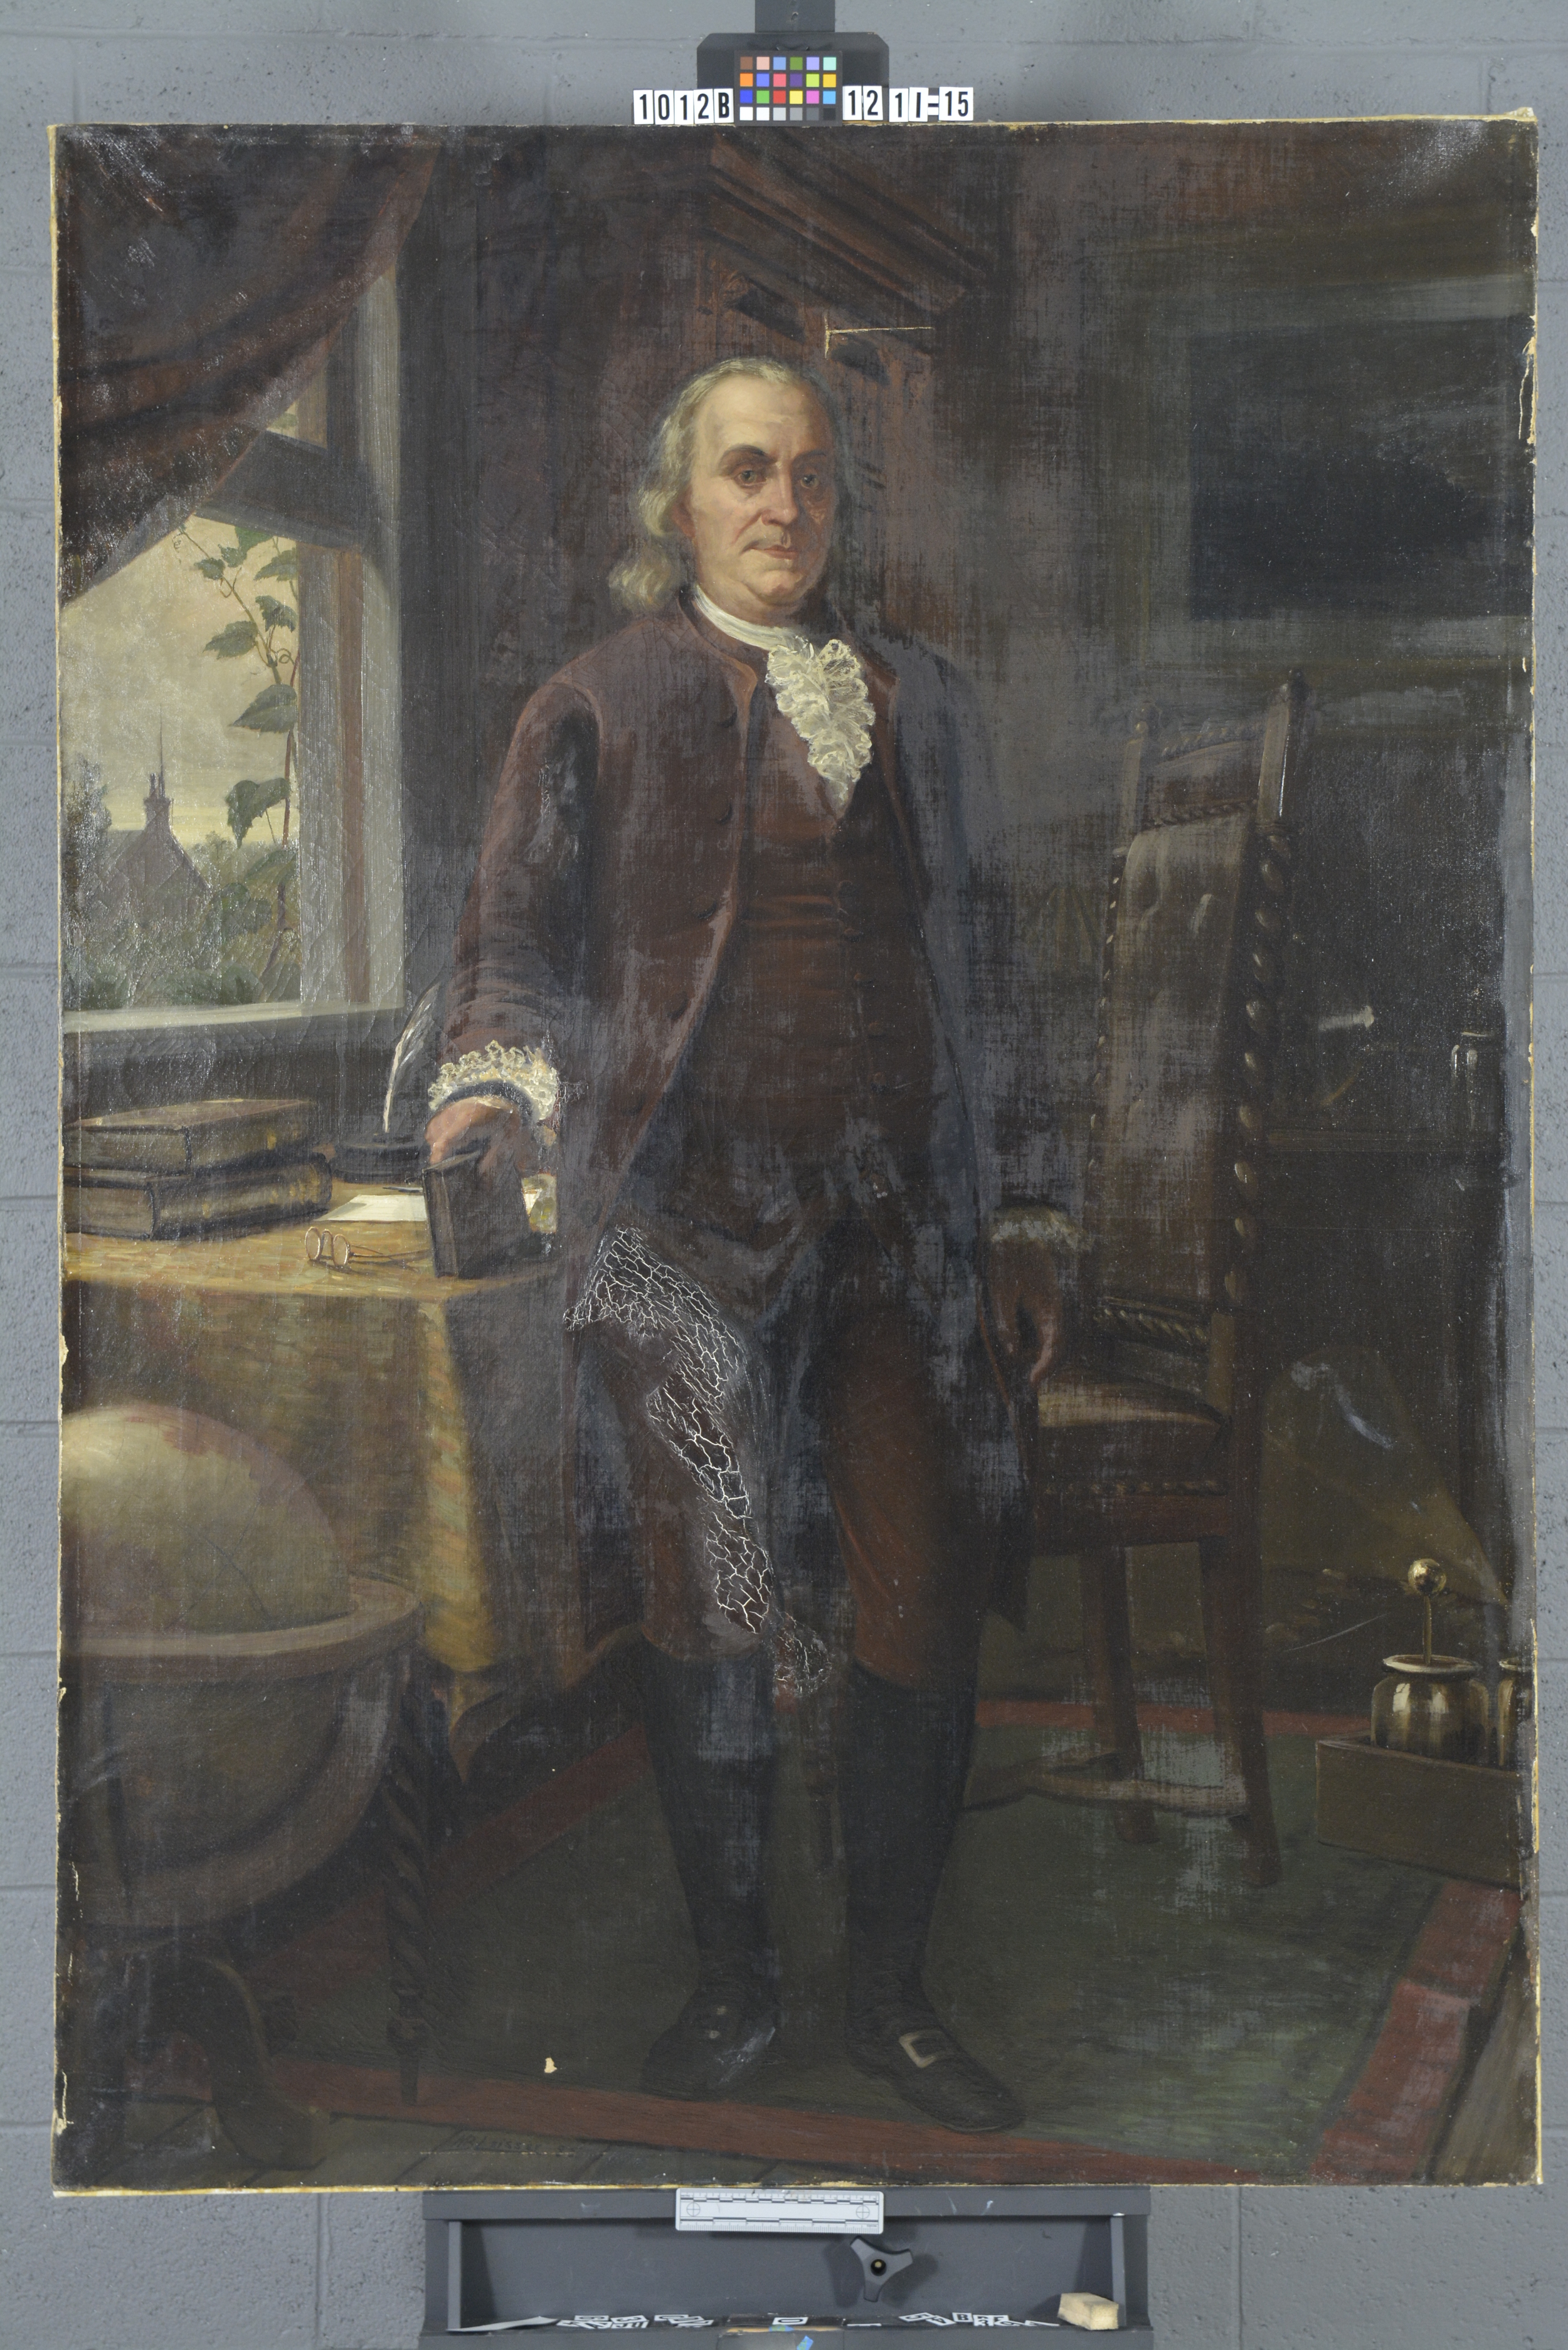
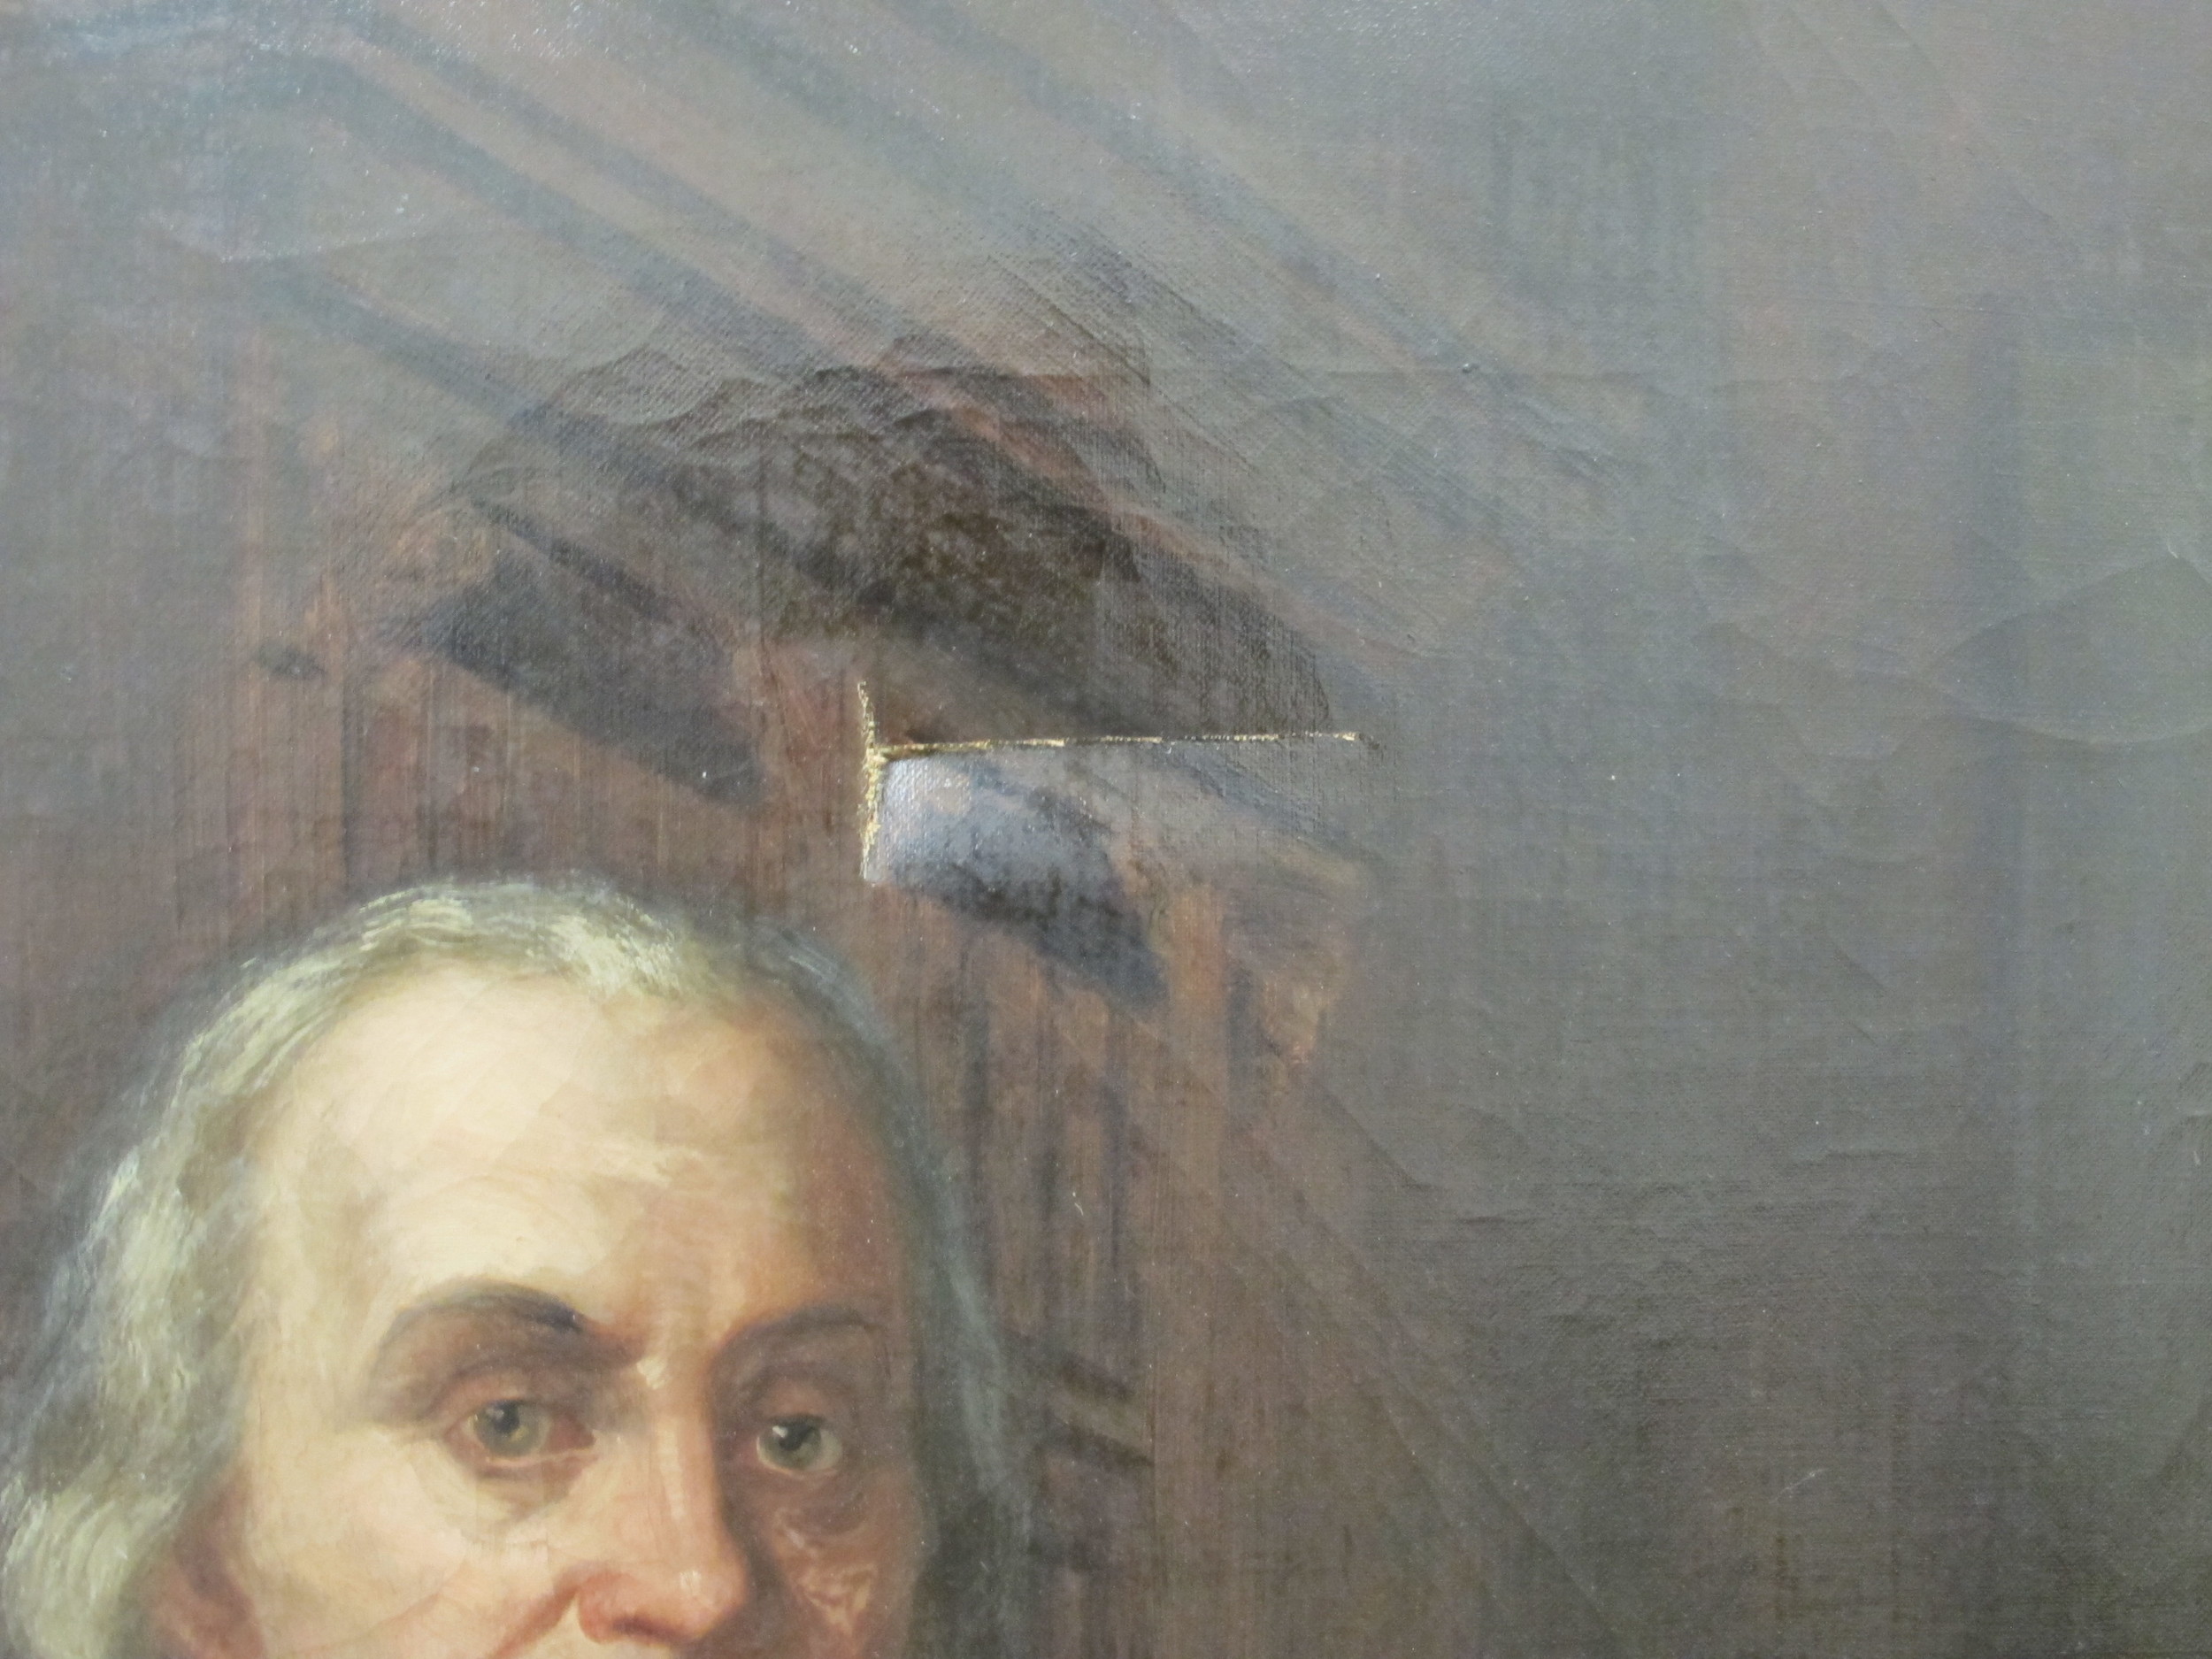
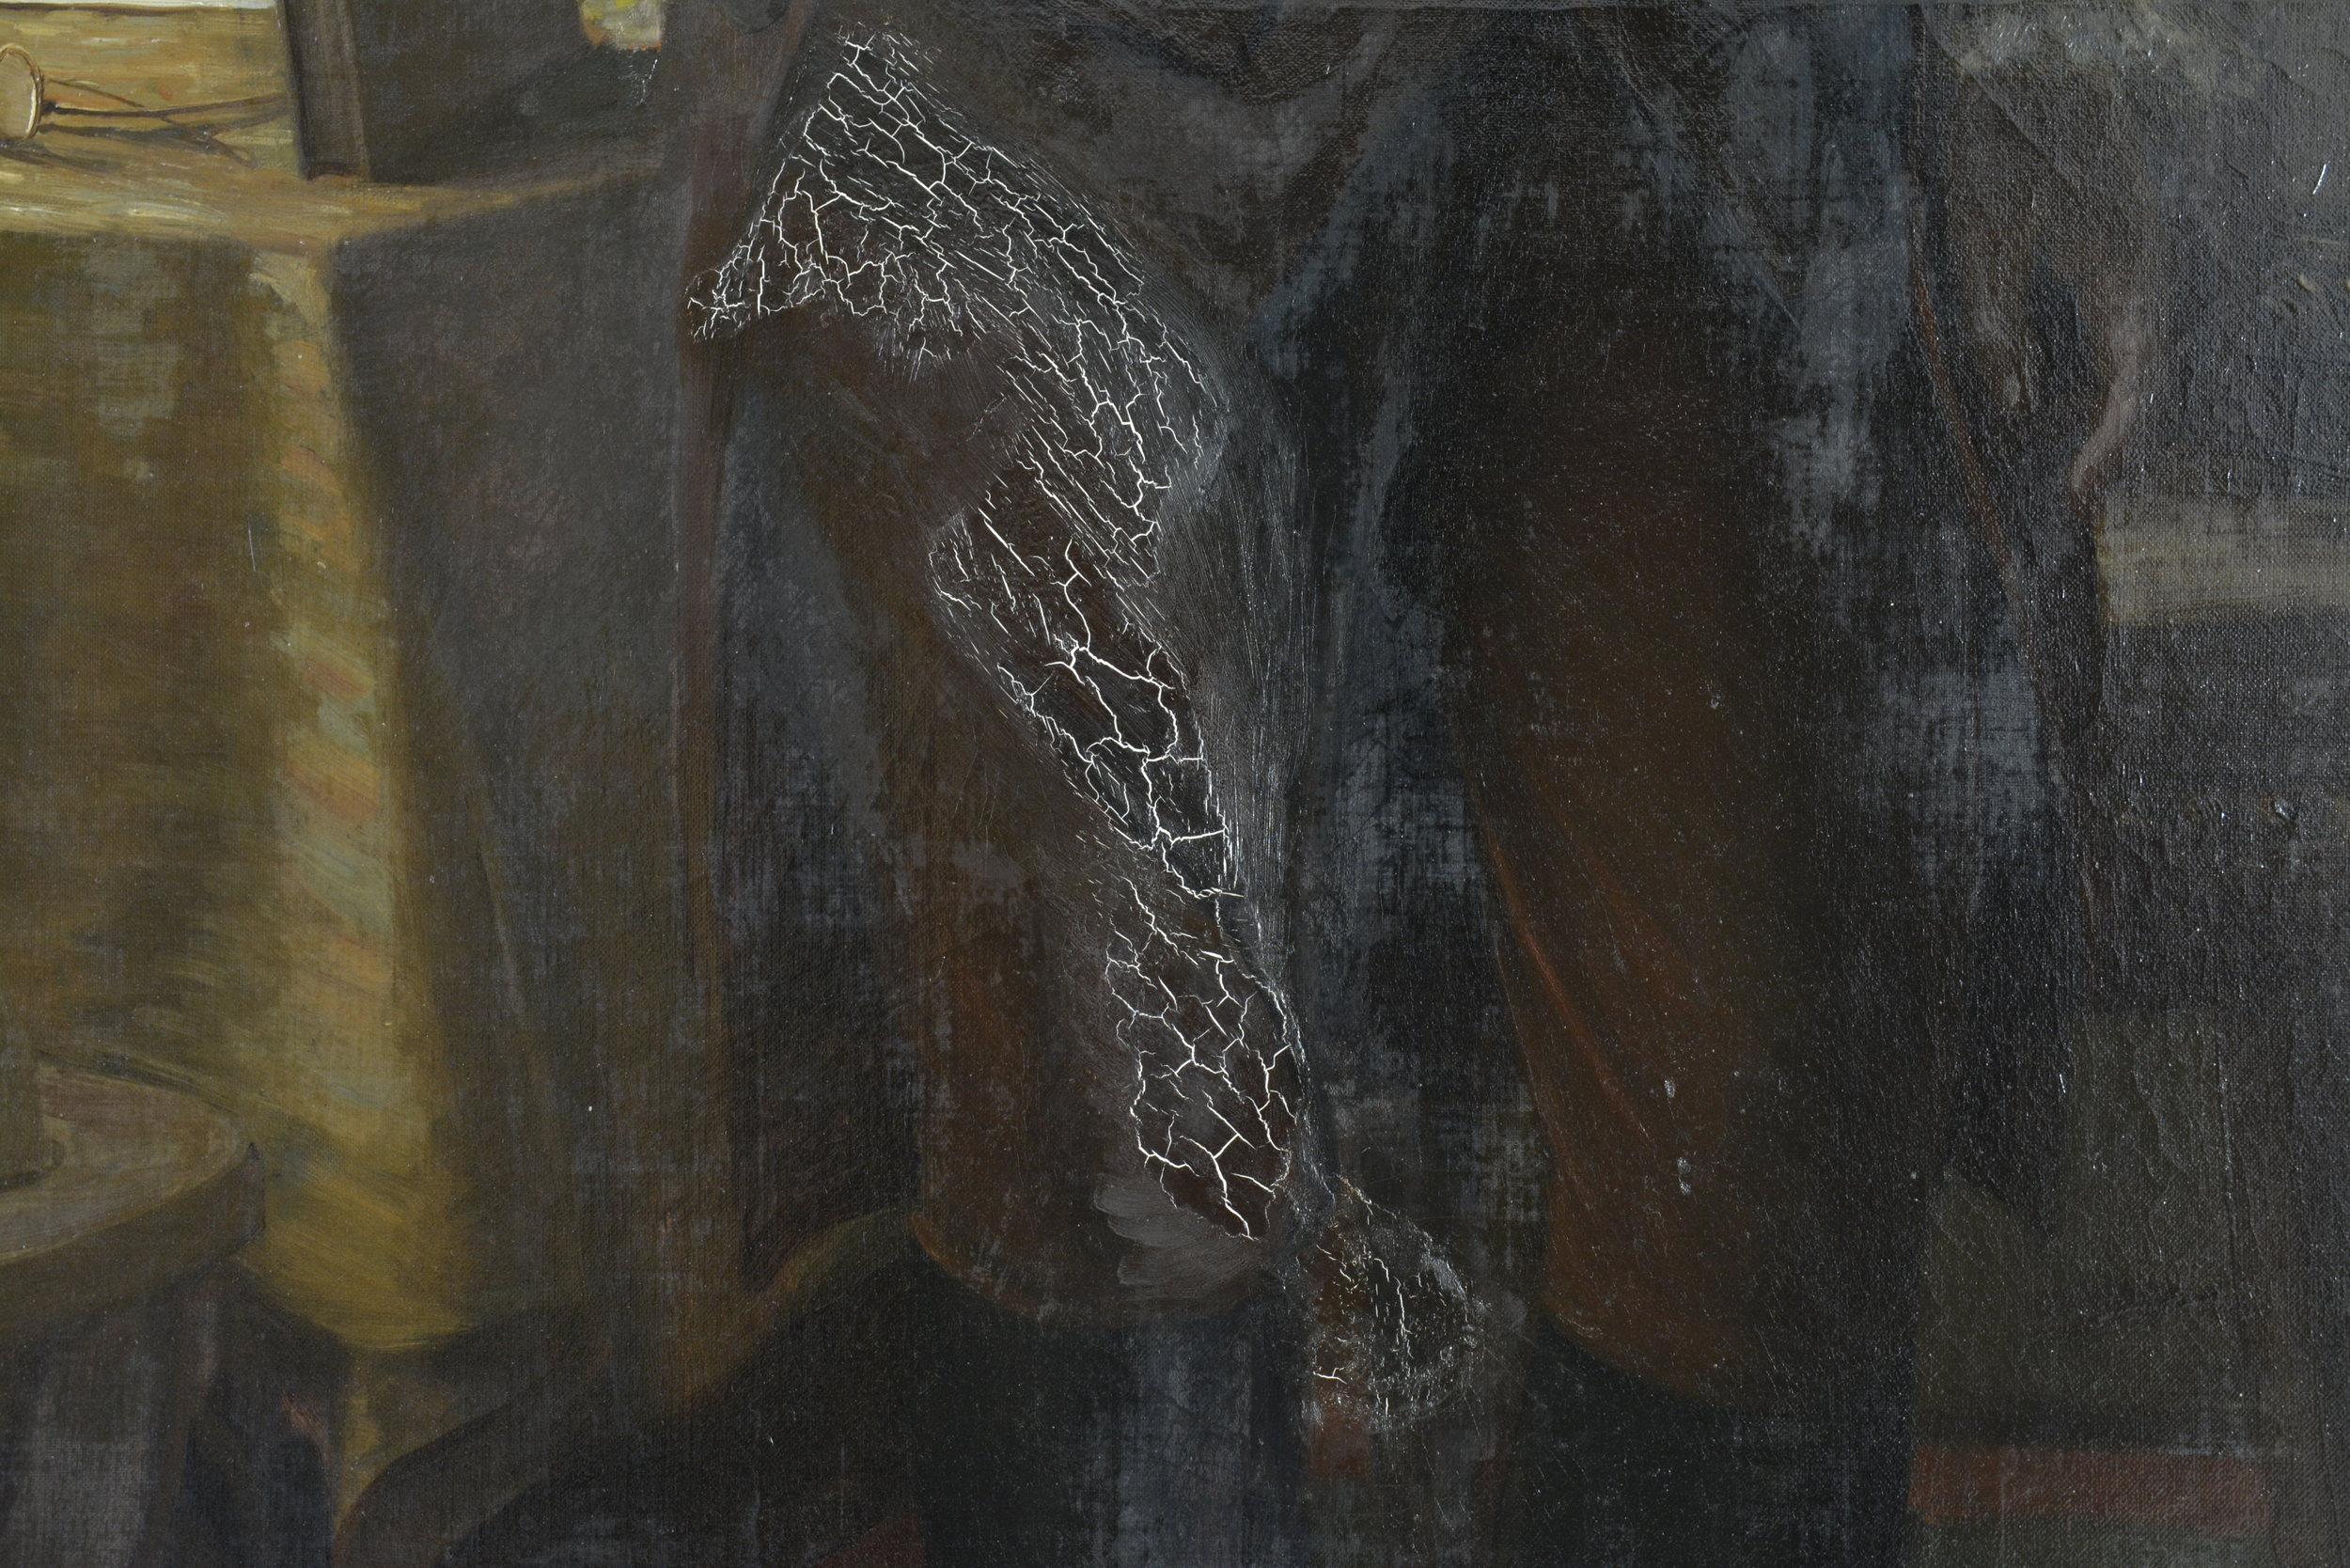
The damage sustained by the impact mainly consists of a four-inch tear above the subject's head. Aside from the damage, the painting has been the apparent recipient of restoration attempts, presumably by a restoration hobbyist, and was lined to a preprimed canvas. There is
also a large area of damage with cracking overpaint on the subject's thigh, in addition to excessive overpaint in scattered locations, uneven varnish, and scattered areas of flaking. In order to treat the tear above Ben's head, the old lining and restorations required removal, as the lining canvas was failing around the edges and around the area of damage.

I look forward to sharing the progress of this treatment with you. Stay tuned for updates and during-treatment photographs!

Just a Mold Trick I Picked Up

This is just an example of how looks can be deceiving.  This painting by Czech artist Cina Jelinek had been inappropriately housed with glass glazing pressed against its surface.  Due to previous exposure to high humidity in a closed atmosphere, the painting was overwhelmed with mold growth. Black and white mold spores were visible in scattered areas across the surface and created a hazy cloud between the painting surface and the glass. 

Before Treatment - framed, under glass


While this appeared to be a very straight-forward treatment, mold should never be taken lightly.  N-99 or N-95 rated masks, eye protection, and gloves should be worn at all times when handling moldy objects.  A vacuum with a Hepa filter was used to clean excess mold off of the surface.  The bag should be disposed of following treatment and removed while wearing proper protection.

Detail of the mold on the surface of the painting and behind the glass

Following removal of excess mold by careful vacuuming, the painting was disinfected with an isopropanol solution to kill any remaining active mold spores. The surface was then cleaned using a dilute solution of triammonium citrate, revealing a much brighter and colorful day by the ocean. The painting exhibited very little damage, other than mechanical cracks on the surface.  Following cleaning, the appearance of the cracks was minimal and only minor inpainting was performed. 

The appearance of mold does not have to mean the death of a well-loved painting or work of art.  Treated with care and housed correctly, works can regain their previous and intended appearance.

For more info on mold and mildew prevention and care see: http://www.si.edu/mci/english/learn_more/taking_care/mnm.html


Step by Step: How to make glue from fish bladders

Part of the routine activities of conservators is to make our own tools and solutions for use in conservation treatment. Many traditional materials can be found on specialty websites andin stores, but some we just prefer to mix ourselves. Isinglass is a natural and refined glue made from gelatin from cooked down sturgeon bladders. It's optical properties, such as reversibility, aging characteristics, and strength, make it a very good choice of glue to be used in many conservation treatment applications. It is used mainly in consolidation (stabilization of flaking media), though also has applications in tear repair, facing, and as a general adhesive. I hope this blog post illustrates the care and time conservators put into selecting (and making) their materials, as well as the actual treatment of art.

First, the swim bladders of the sturgeon are purchased dried and unprocessed. They should be free of blood clots and other large inclusions.  For this project, I used 50 grams of dried Salianski bladders purchased from L. Cornelissen & Son.


The swim bladders should be soaked overnight in water using approximately a 1:10 glue-to-water ratio.  I eye-balled the ratio in a large glass beaker to a final volume of about 800 ml. To help them absorb water, the bladders can be cut into smaller pieces. I found this time-consuming and difficult, so I ended up soaking them whole. After a period of 24 hours, the bladders should be spongy to the touch and able to be easily pulled apart. 

Once the bladders are sufficiently spongy, they should be kneaded into a homogeneous blob. The texture was kind of doughy at this point, and obtaining the blob was easier than I thought. Any hard bits should be worked into the dough. If there are a few remaining, they will be filtered out at a later stage.  


The glue and water were placed in a makeshift double boiler using the glass beaker, a wooden block, and a large cooking pot.  The mixture should be cooked in hot water, never exceeding 140 degrees F (60 degrees C). I allowed the glass beaker to come to temperature in the water and kept a digital thermometer in the cooking water to monitor the water temperature. To double check, I also kept a meat thermometer inserted in the water and had a glass of cold water on hand to cool the water, if necessary. As the water began to reach temperature, the mixture became cloudy as the dough began to dissolve.  The solution was stirred with regularity and after about 45 minutes, the glue was mostly in solution. I found that I had to get the outside water temperature very close to 140 for the majority of the mixture to dissolve. The water eventually became more clear as the dough melted. To see that all was well, I checked the tack of the glue as it neared completion, and the results were satisfactory.   

After cooking, the solution was filtered into a large glass jar through a nylon stocking. The material remaining in the stocking should be squeezed through to help dissolve any remaining bits. This solution was then re-filtered using the same stocking.  Bits remaining after the second filtration can be discarded with the stocking. At this point, the solution should be yellowish and clear of bits.  I poured it onto a sheet of non-stick Mylar that had been previously prepared over a large table.  Incidentally, I also had to prepare an additional sheet of Mylar to accommodate the large amount of glue produced. The glue should be left undisturbed to dry. To make more homogeneous and complete sheets, I attempted to spread the glue mid-drying with a piece of stiff Mylar with some success. I did end up getting areas of pooling that took longer to dry than others.   

Once the sheet is sufficiently dried, they can be easily separated from the Mylar and cut up into smaller pieces to be stored for later use. 

The cut up pieces can be stored in jars and re-dissolved in water as they are needed.  Though lengthy, the preparation of the glue yielded enough dried glue to last for a few years.  The product is very refined and sure to contain no additional additives, bulking agents, or colorants. 

For the instruction on the preparation of isinglass, I would like to give credit to my graduate painting conservation professor James Hamm at Buffalo State College and to Jill Whitten and Rob Proctor. 

The final product


CREate Festival 2015

Alba Art Conservation has been awarded an Entrepreneur Fellowship to exhibit in the Innovation Salon at Pittsburgh's CREate Fest 2015!  I will be discussing how art and science overlap in the field of conservation and will showcase a few of my ongoing treatments.  I am looking forward to a great outreach opportunity and to meet other local entrepreneurs. 

CREate Fest brings together artists, artistic folk, creatives, and techies to learn from each other and show how our fields overlap. 

You can check out their goals and mission on their website:  http://create-festival.com/

"MISSION   To foster, connect and sustain emergent intersections of creativity and industry.

PURPOSE  To serve as a collaborative hub that ignites creativity and innovation, enhances interconnectivity and provides opportunity for creative, cultural transformation. The network serves seven key clusters: Design, Communications, Fine Arts, Entertainment, Software & Hardware, Data Science and Creative Industry Support Services.

IDEate. INNOVate. INTEGRate:
Art + Technology Explorations
"